Affichage des articles dont le libellé est Work in progress - Travaux en cours. Afficher tous les articles

mardi 8 juillet 2014

World Expo project - part III

Hi!

Here is the last teaser before the World Expo.
I'll post final pictures of this project next week.

Salut !

Voici le dernier teaser avant la World Expo.
Je publierai les photos du projet fini la semaine prochaine.

The engine is now glued in place.
The buoy recieved a lot of weathering: dust, rust, streakings, spilled oil and grease.
Le moteur est maintenant collé.
La bouée a reçu sa patine : poussière, rouille, coulures, éclaboussures de graisse et d'essence.


The fins are glued too, there will be another element on the diorama painted using the blue color and the chameleon logo.
Les ailerons sont collés aussi, il y aura un autre élément du diorama qui sera peint dans la même teinte bleue et qui reprendra le logo du caméléon.

And a global view.
Et une vue globale pour finir.

Now I need to add all the details elements to compose the diorama and glue the diorama on its base.

See you in Stresa! Or next week here ;)

Maintenant il ne reste plus qu'à ajouter tous les éléments de détails qui composent le diorama et coller le diorama sur son socle.

A bientôt à Stresa ! Où la semaine prochaine ici ;)


Enjoy!

vendredi 4 juillet 2014

World Expo project - part II

Hi!

Today I'll show you some painting steps on the buoy.
It's a bit hard to paint due to its size.

Salut !

Aujourd'hui je vais vous montrer quelques étapes de peinture de la bouée.
Elle est un peu difficile à peindre à cause de sa taille.


Base color using a mix of Gaianotes Oxyde red and black.
Couleur de base avec un mélange d'Oxyde red et noir Gaianotes.


A few coats of hairspray then highlights using white.
Quelques couches de laque à cheveux puis la pose des lumières avec du blanc.


First coats of red.
Premières couches de rouge.


To tone down the red I applied a mix of red and sand color in particular on the highlights.
Pour obtenir un rouge un peu passé j'applique un mélange de rouge et de couleur sable en particulier sur les lumières.


Again a few coats of red to avoid the pink color due to the previous step.
Quelques légers voiles de rouge pour casser la couleur rosée de l'étape précédente.


Masking to make the white stripe.
Masquage pour faire la bande blanche.


The white stripe done!
La bande blanche est faite !


Using a mix of red and black I lightly blend the stripe.
Avec un mélange de rouge et de noir je fond légèrement la bande.


I applied Tamiya clear yellow (glossy) on the lights.
J'applique du jaune transparent (brillant) sur les lampes.

Enjoy!

vendredi 27 juin 2014

World Expo project

Hi!

The 2014 World Expo is approaching, in two week I'll be in Stresa, Italy, for this big event.
I'm working on a quite big project that will enter in the new Sci-Fi scale models and dioramas.

I won't reveal the whole project before the event (and because it's still in progress) but I'm going to show you some pictures.

Salut !

La World Expo 2014 approche à grand pas, dans 2 semaines je serai à Stresa, en Italie, pour ce grand évènement.
Je travaille sur un projet assez gros qui entrera dans la toute nouvelle catégorie Maquettes et dioramas Science-Fiction.

Je ne vais pas vous révéler tout le projet avant cet évènement (il n'est pas encore fini) mais je vais vous montrer quelques photos.


The main model of this project is the Skymark from Industria Mechanika based on a concept by Ian McQue.
Industria Mechanika develops model kits based on illustrations or 3D models made by famous artists such as Ian McQue, Scott Robertson, Adrian Smith, Christophe Deese, etc.
These kits are made in high quality resin and everything you need is provided (photo-etch details, brass rods, wires, decals, etc.), except the tools of course :P

It was the first time I worked with so much photo-etch parts, the kit is relatively hard to build, the photo-etch needs welded, it was a very interesting new experience, I've learnt a lot.

La pièce principale de ce projet est le Skymark d'Industria Mechanika basé sur un concept de Ian McQue.
Industria Mechanika développe des kits basés sur des illustrations ou des modèles 3D créés par des artistes renommés tels que Ian McQue, Scott Robertson, Adrian Smith, Christophe Deese, etc.
Ces kits sont en résine de haute qualité et tout ce dont vous avez besoin est fourni (photo-découpe, tiges de laiton, fils de fer, décals, etc.), sauf les outils bien sûr :P

C'était la première fois que je travaillais avec autant de pièces en photo-découpe, le kit est relativement difficile à monter, il faut souder la photo-découpe, ce fut une nouvelle expérience intéressante, j'ai beaucoup appris.


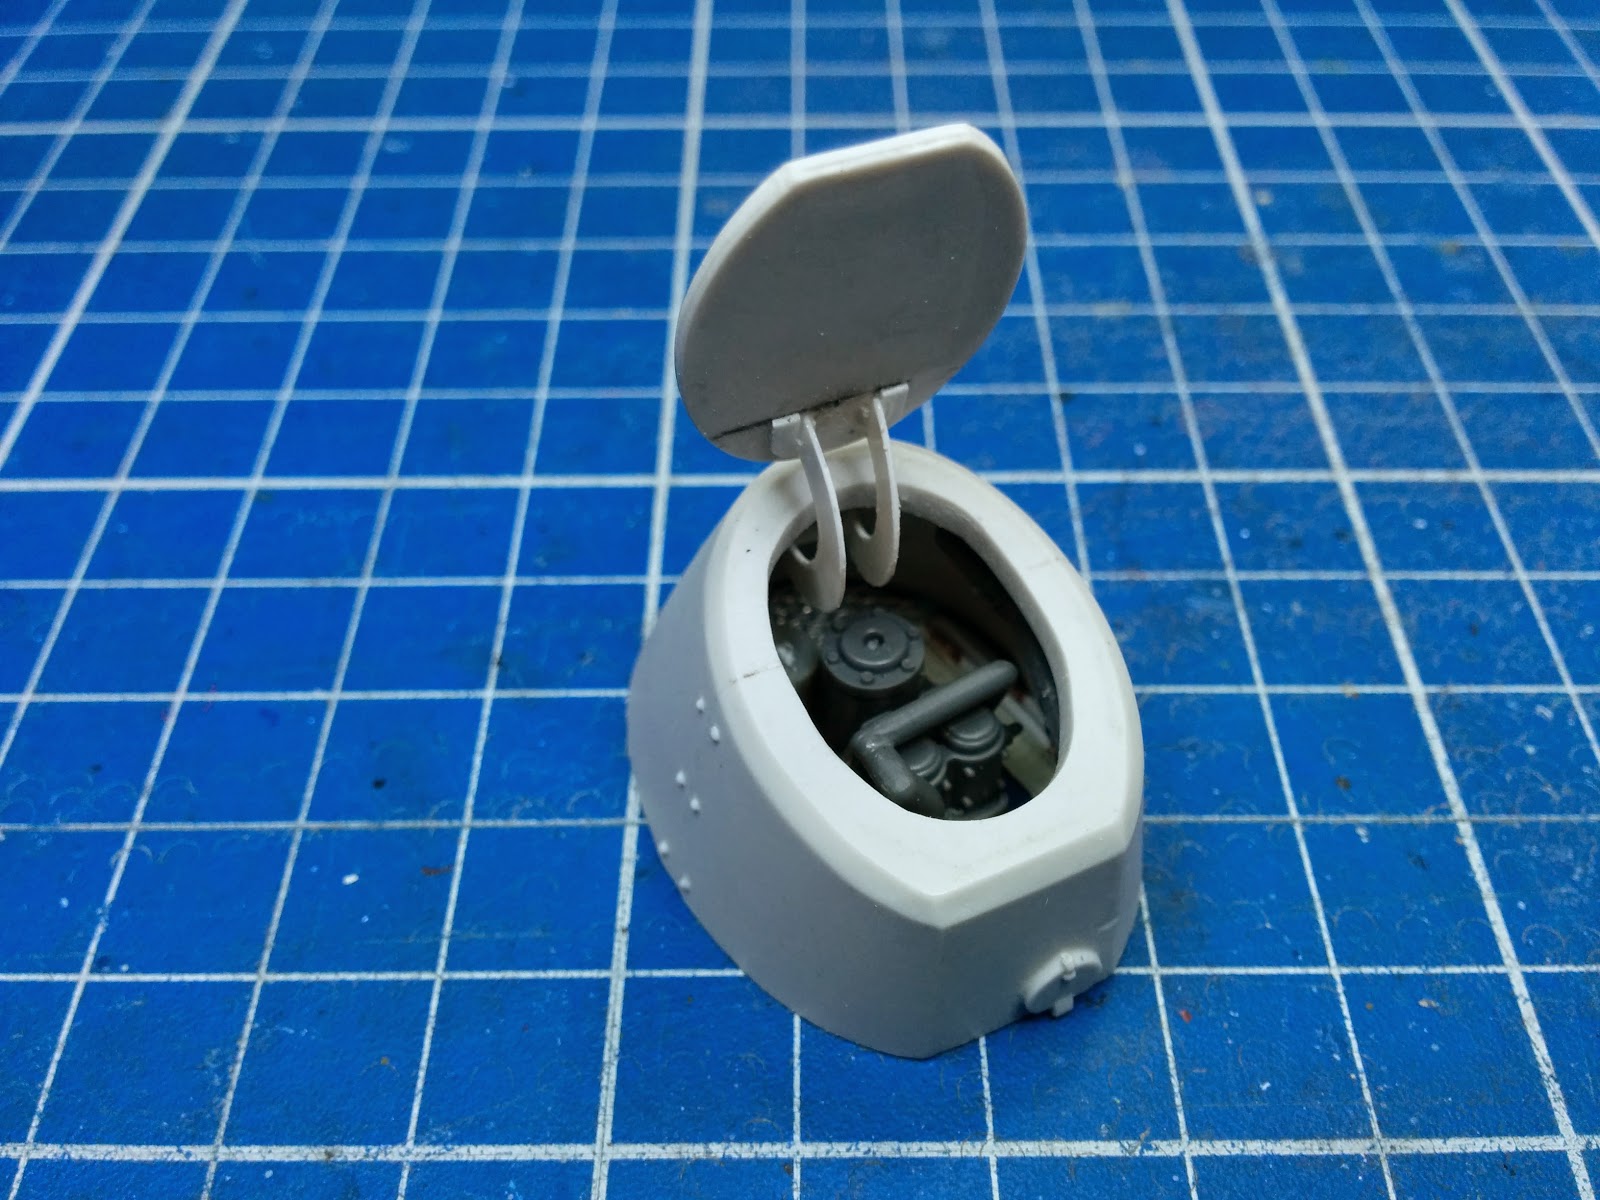
I wanted to open the engine hatch so i hollowed out the compartment with a drill and I built an engine from scratch.

Je voulais laisser la trappe du moteur ouverte, j'ai donc évidé le compartiment avec une perceuse et j'ai construit un moteur.


Enjoy!

mercredi 25 juillet 2012

Black Crusade 2012 & William Tell

2010 – The Stormwarden Project
2011 – Heroes of Armageddon
2012 – The Black Crusade


We are happy to announce a new campaign in the tradition of the Stormwarden Project (http://stormwardens.blogspot.com/) and the Heroes of Armageddon (http://heroesofarmageddon.blogspot.com/).

Over the next weeks, the Black Crusade 2012 will take place. We assembled a whole new team of hobby enthusiasts who will build and paint a massive Warhammer 40K Chaos Space Marine army just to give it away in a big raffle!
This year's campaign will benefit the Jack Vasel Memorial Fund, a charity that provides financial assistance to members of the gaming community and who have suffered personal hardship.

How does it work?
Every dollar you contribute gives you a chance to be the lucky new army winner at the end of this drive. 10 dollars contribution = 10 chances to win. 100 dollars = 100 chances... you get the idea.
In short: the more you contribute, the better your chances. More importantly, the more you contribute, the more you help to make the world a better place.
At the end of the drive, on August 10th, we will choose and announce the winner.
And of course we will have additional give-aways of all kind of gaming related goodies for you! The winners of those prizes will be drawn form everybody who donated to that point, so get your lots in early!

Visit http://blackcrusade2012.blogspot.com

This year I'm participating in this project. I'm painting a Black Legion land raider.
I've slightly changed the gold and black color scheme by choosing a dark green color instead of black.

Here is a picture of the WIP.

--

2010 – The Stormwarden Project
2011 – Heroes of Armageddon
2012 – The Black Crusade


Suite au Stormwarden Project (http://stormwardens.blogspot.com/) et à Heroes of Armageddon (http://heroesofarmageddon.blogspot.com/) cette année est organisée la Black Crusade 2012.

Durant les semaines qui viennent une armée de Space Marine du Chaos sera assemblée et peinte et sera ensuite offerte en lot d'une tombola.
Mais pas n'importe quelle tombola puisqu'elle se fait au profit d'une oeuvre caritative le Jack Vasel Memorial Fund.

Pour chaque dollar versé, vous avez une chance de gagner, donc pour 10$ vous avez 10 chances, etc.

L'an dernier ce sont près de 50.000$ qui ont été reversés à Médecins sans frontières.

Toutes les informations sont ici : http://blackcrusade2012.blogspot.com

Cette année je participe à ce projet en peignant un land raider de la Black Legion.
J'ai légèrement dérivé du schéma de couleur or et noir en choisissant un vert sombre.

Voici une photo de la peinture en cours.


I'm also working on my first historical miniature.
It's William Tell, the exclusive historical miniature sculpted for the World Expo last year in Switzerland.

It's only the very beginning WIP.

--

Je travaille aussi sur ma première figurine historique.
Il s'agit de Guillaume Tell, la figurine exclusive sculptée à l'occasion de la World Expo, l'an dernier en Suisse.

Ce n'est que le tout début du travail.

lundi 26 septembre 2011

Nurgle lord - Seigneur de Nurgle

A little WIP started last week-end, the new plastic Nurgle lord.

The quality of this kit is amazing ! Few mold lines, high level of details, perfect assembly.

Only the skin and the armor are almost finished, I still need to add varnishes to make it shiny :)
I hope to finish it this week.

Maybe I'll paint a second version more greenish soon...

--

Un petit WIP débuté ce week-end, le nouveau seigneur de Nurgle en plastique.

La qualité de ce kit est impressionnante ! Peu de lignes de moulage, haut niveau de détails, assemblage parfait.

Seules la peau et l'armure sont bien avancées, il manque encore quelques touches de vernis pour le rendre encore plus ragoutant :)
J'espère le finir cette semaine.

Peut-être que j'en peindrai une autre version plus verdoyante prochainement...


mardi 9 août 2011

Renegade sentinel continued

I've continued the work on the sentinel.
I've finished the chaos star, the metallics, pigments and oil and grease effects.
I need to paint the pilot, the base and make mud effects.

--

J'ai continué le travail sur la sentinelle.
J'ai fini l'étoile du chaos, les métaux, les pigments et les effets de graisse.
Il me reste à peindre le pilote, le socle et faire des effets de boue.


vendredi 22 juillet 2011

Renegade sentinel WIP

In last few weeks I've prepped several minis and projects, I don't know if I'll finish them all one day...

I didn't wanted to paint figures so I decided to build and paint a vehicle.
I found an old Imperial Guard sentinel kit in a box, decided to make a chaos renegades sentinel, built it, added some (very) little accessories and built a base.

--

Ces dernières semaines j'ai monté et préparé plusieurs figurines et projets, je ne sais pas si je les finirai tous un jour...

Je n'avais pas envie de peindre des figurines, j'ai donc décidé de monter et peindre un véhicule.
J'ai trouvé un vieux kit de sentinelle Garde Impériale dans un boîte, j'ai décidé d'en faire une sentinelle des renégats du chaos, je l'ai monté, j'y ai ajouté quelques petits accessoires et j'ai construit un socle.


After the construction, I've started the painting process with aibrush and then, after a satin gloss varnish coat, I've applied some oil washes.

--

Après la construction j'ai débuté la peinture à l'aérographe et ensuite, après une couche de vernis satiné, j'ai passé quelques lavis d'huile.


The scratches on the paint are made with acrylic paint applied with blister foam.
For the streakings I used AK interactive's streaking effects set, it was the first time I used these products, it's very cool and easy to use :)
I've painted a chaos star in freehand, I still need to refine it.

--

Les écailles de peintures sont faites avec de la peinture acrylique appliquée à l'aide de mousse de blister.
Pour les traces de ruissellement j'ai utilisé le streaking effects set de AK interactive, c'était la première fois que j'utilisais ces produits, c'est très pratique et facile à utiliser.
J'ai peint une étoile du chaos à main levée, il faut encore que je l'affine.


More WIP pictures soon !
The base will be muddy, I have to test the AK interactive's mud set ;)

--

La suite arrive bientôt !
Le socle sera boueux, je dois tester le mud set de AK interactive ;)

vendredi 24 juin 2011

Wip Wip Wip

A quick message to show you my latest works in progress.
From left to right : A Yoda from Knight models, a river troll from Games-Workshop and a Sebastian Cross from Soda Pop Miniatures.

The Yoda will may join my display at World Expo, the troll is just for fun and Sebastian Cross is a commission work.

I'll post more WIP pictures of each model as soon as I've continued to work on them :)

--

Un message rapide pour vous montrer mes derniers travaux en cours.

De gauche à droite : un Yoda de Knight models, un troll d'eau de Games-Workshop et un Sebastian Cross de Soda Pop Miniatures.

Le Yoda devrait rejoindre mon display pour la World Expo, le troll c'est juste pour le fun et Sebastian Cross est une commande.

Je posterai plus de photos de chaque figurine dès que j'aurai continué à travailler dessus :)

lundi 6 décembre 2010

Fury of Ivan, part 2

Here are some work in progress pictures of the Fury of Ivan.

Weathering with oils is mostly done, still some acrylic work, metallics, rust, mud and of course dust ;)

--

Voici des photos de l'avancement du travail sur le Fury of Ivan.

Le vieillissement à l'huile est presque fini, il reste encore du travail à l'acrylique, les métaux, de la rouille, de la boue et de la poussière.


mercredi 24 novembre 2010

Fury of Ivan, part 1

I've begun to work on the Fury of Ivan from Paolo Parente's Dust tactics.

I've tried to make a winter camo scheme using the hairspray technique, the result is interesting but very unpredictable.
I need to work more on the "transitions" between green and white zones.
And, of course, there's still a lot of work of weathering to be done.

--

J'ai commencé à travailler sur le Fury of Ivan de la gamme Paolo Parente's Dust tactics.

J'ai essayé de faire un schéma de camouflage hivernal en utilisant la technique de la laque à cheveux, le résultat est intéressant mais très aléatoire.
Il faut que je retravaille les "transitions" entre les zones vertes et blanches.
Et, bien sûr, il reste encore beaucoup de travail de vieillissement à faire.


mardi 23 novembre 2010

One week in Ogre kingdoms, day 5 - Une semaine dans les royaumes Ogres, jour 5

Sorry for my late post, the ogre is finished since november 12th.
Here are the pictures.

The color scheme I used :
  • Skin :

    • base : tallarn flesh(GW foundation)

    • highlights : elf flesh(GW) and ivory(VMC)

    • shadows : black red(VMC)

    • glazes of scab red(GW) on the face

  • Pants :

    • base : camo green(GW)

    • highlights : rotting flesh(GW) and off white(VMC)

    • shadows : english uniformV(MC) and chaos black(GW)

  • Leather :

    • base : english uniform(VMC)

    • highlights : bleached bone(GW)

    • shadows : chaos black(GW)

  • Copper :

    • base : brazen brass(GW)

    • highlights : copper(VM Air)

    • shadows : scorched brown(GW) and chaos black(GW)

    • glazes of light turquoise(VMC) to simulate oxydation

  • Steel :

    • base : boltgun metal(GW)

    • higlights : chainmail(GW) and silver(VM Air)

    • shadows : chaos black(GW)

    • bestial brown(GW), snakebite leather(GW) and bubonic brown(GW) were used to make the rust


GW : Games Workshop Citadel Colors
VMC : Vallejo Model Colors
VM Air : Vallejo Model Air
--

Désolé pour le message tardif, l'ogre est fini depuis le 12 novembre.
Voilà les photos.

Le schéma de couleur utilisé :
  • Peau :

    • base : tallarn flesh(GW fondation)

    • éclaircies : elf flesh(GW) et ivoire os(PA)

    • ombres : rouge noir(PA)

    • glacis de scab red(GW) sur le visage

  • Pantalon :

    • base : camo green(GW)

    • éclaircies : rotting flesh(GW) et blanc cassé(PA)

    • ombres : uniforme anglais(PA) et chaos black(GW)

  • Cuir :

    • base : uniforme anglais(PA)

    • éclaircies : bleached bone(GW)

    • ombres : chaos black(GW)

  • Cuivre :

    • base : brazen brass(GW)

    • éclaircies : cuivre(PA Air)

    • ombres : scorched brown(GW) et chaos black(GW)

    • glacis de turquoise clair(PA) pour simuler l'oxydation

  • Acier :

    • base : boltgun metal(GW)

    • éclaircies : chainmail(GW) et argent(PA Air)

    • ombres : chaos black(GW)

    • bestial brown(GW), snakebite leather(GW) et bubonic brown(GW) ont été utilisés pour faire la rouille


GW : Games Workshop Citadel Color
PA : Prince August
PA Air : Prince August Air


You can vote here / Vous pouvez voter ici :

http://www.coolminiornot.com/264475


I also add one picture of the mini I painted during the masterclass to demonstrate the techniques.

On this one I used dark flesh(GW) and chaos black(GW) for the shadows of the skin.
The leather was made with a base of bestial brown(GW) and graveyard earth(GW), highlighted with bronzed flesh(GW) and ivory(VMC), shadows with chaos black(GW) and glazes of oxford blue(VMC) in the shadows and scab red(GW) on the base and the first highlights.

--

Je rajoute aussi une photo de la figurine que j'ai peint durant le stage pour montrer les techniques.

Sur celui-ci j'ai utilisé du dark flesh(GW) et du chaos black(GW) pour les ombres de la peau.
Le cuir a été fait avec une base de bestial brown(GW) et graveyard earth(GW), éclaircie au bronzed flesh(GW) et ivoire os(PA), ombré au chaos black(GW) et des glacis de bleu sali foncé(PA) dans les ombres et de scab red(GW) sur la base et le premières éclaircies.

vendredi 12 novembre 2010